Application Flow
Add Bill - Application Flow
Setup Bill
In the Dashboard section, user can choose a bill in one of two ways:
Option 1: Select any bill from the list provided within the Add your Bills section.
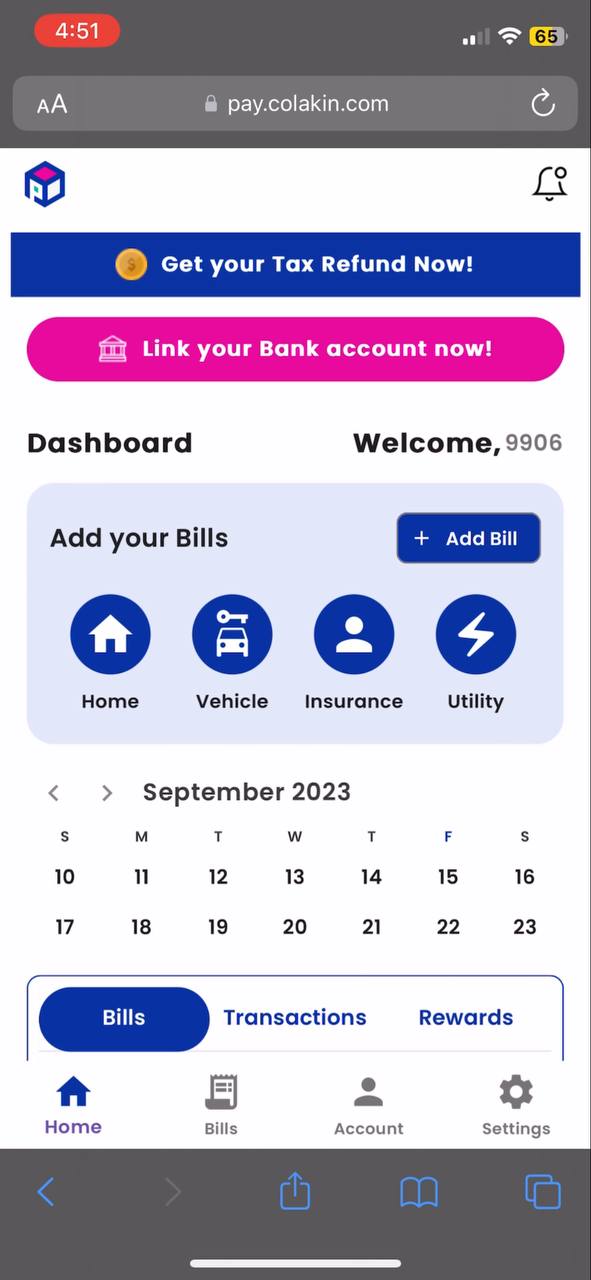
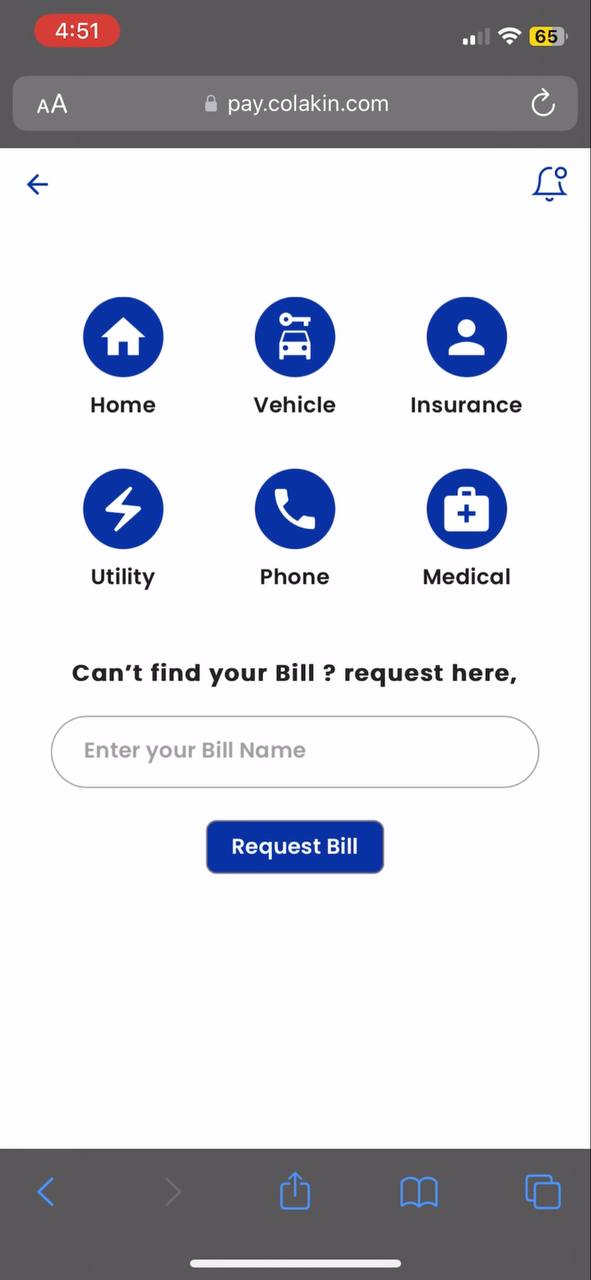
Option 2: Alternatively, you can select the + Add Bill button, then navigate to the Bill Category Page, and select the bill from there.
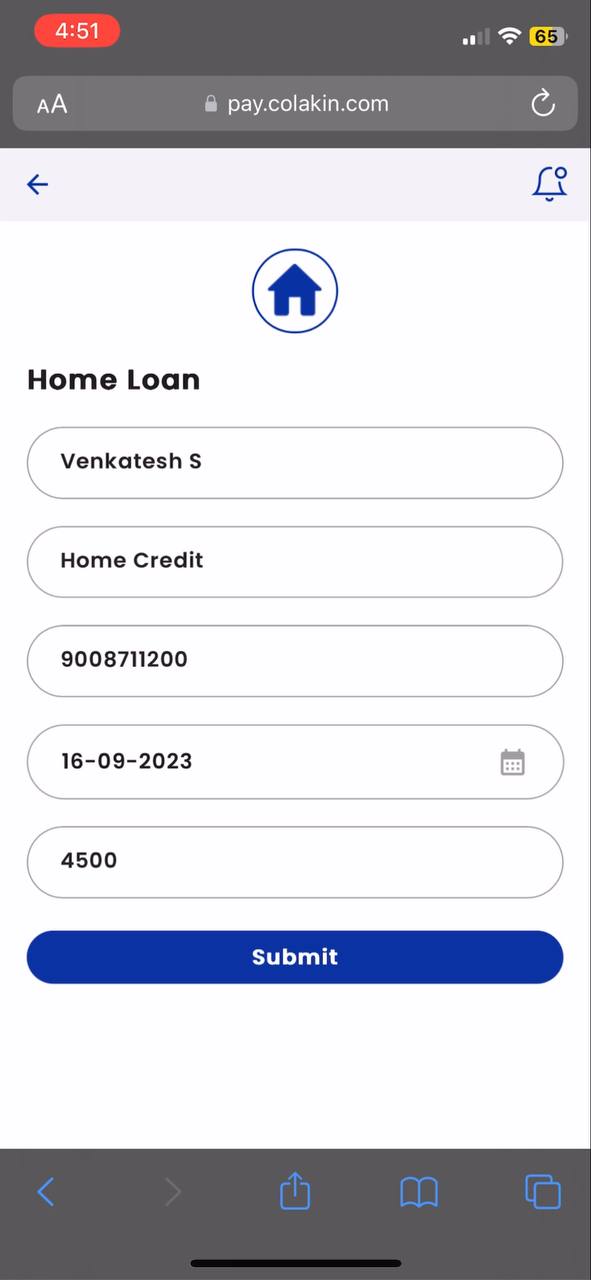
Enter Bill Details
In this step, you need to input accurate and complete bill information, including:
Provider Name: Enter the name of the bill's service provider.
Provider Number: Input the unique identification or account number associated with the bill.
Due Date: Specify the date by which the bill must be paid.
Due Amount: Enter the exact amount that needs to be paid for the bill.
View Bill Details & Status
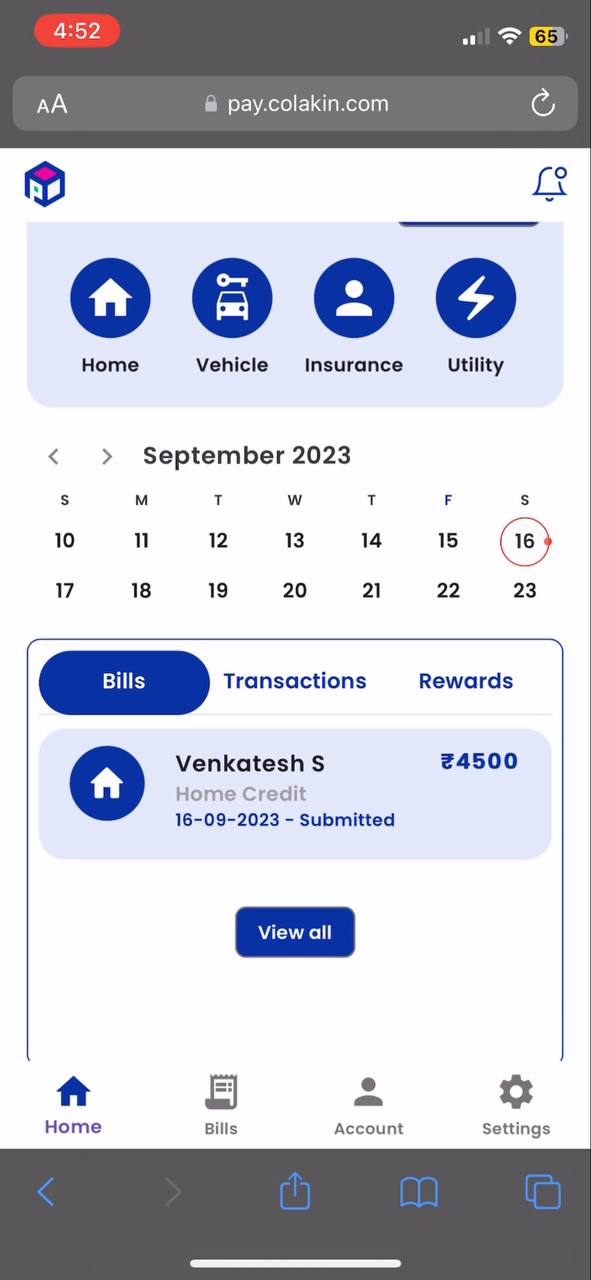
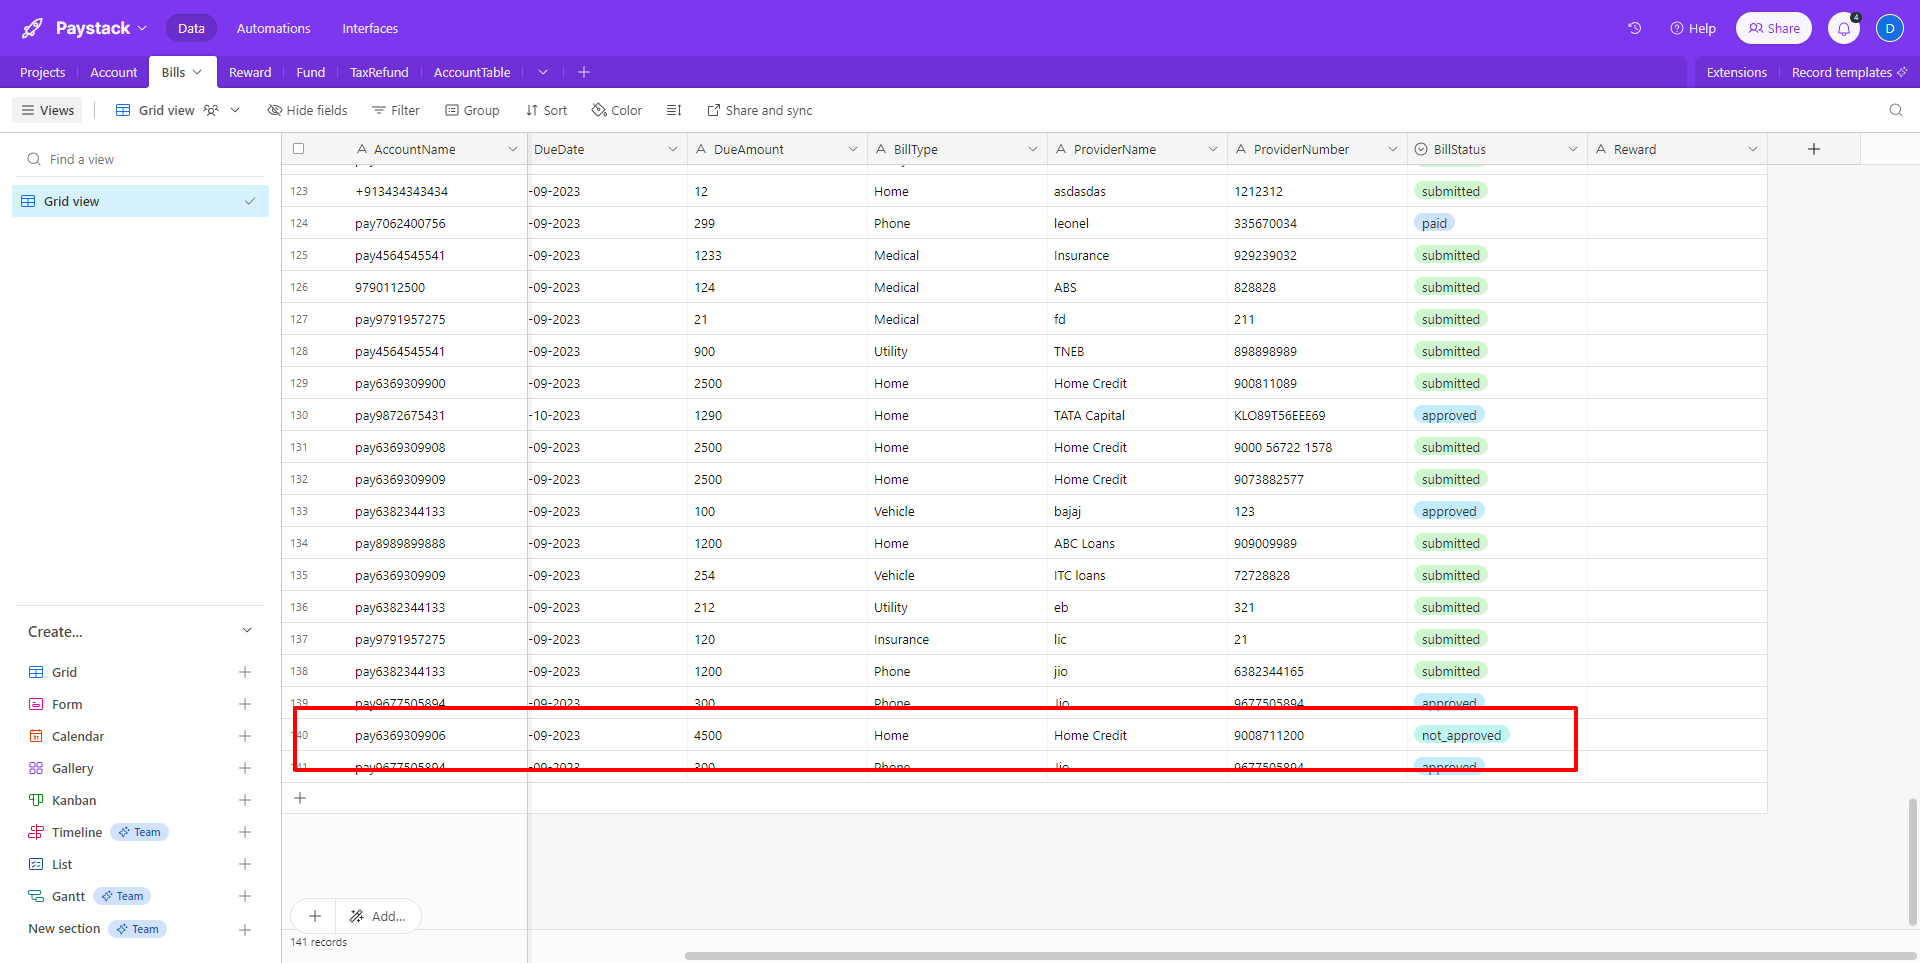
Submitted
After successfully adding a bill, the system will automatically take you to the Bills Screen. Here, you can view the details of your bill. Initially, when you first add a bill, its status is marked as "Submitted" because it has been sent for verification. This status will remain until the verification process is completed.
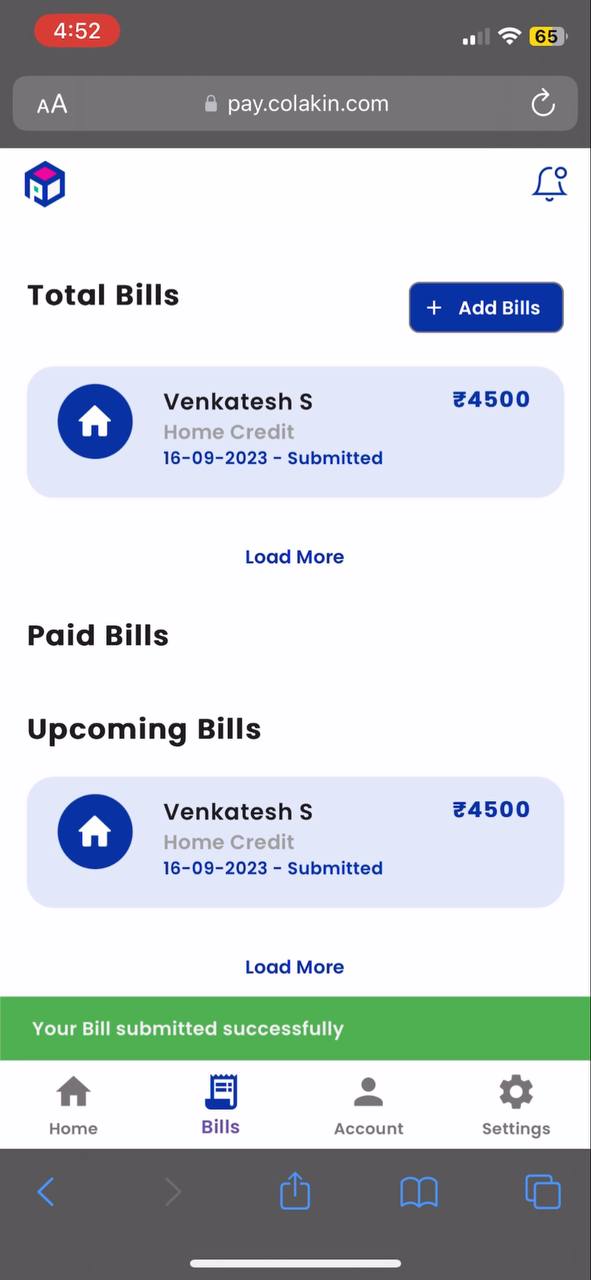
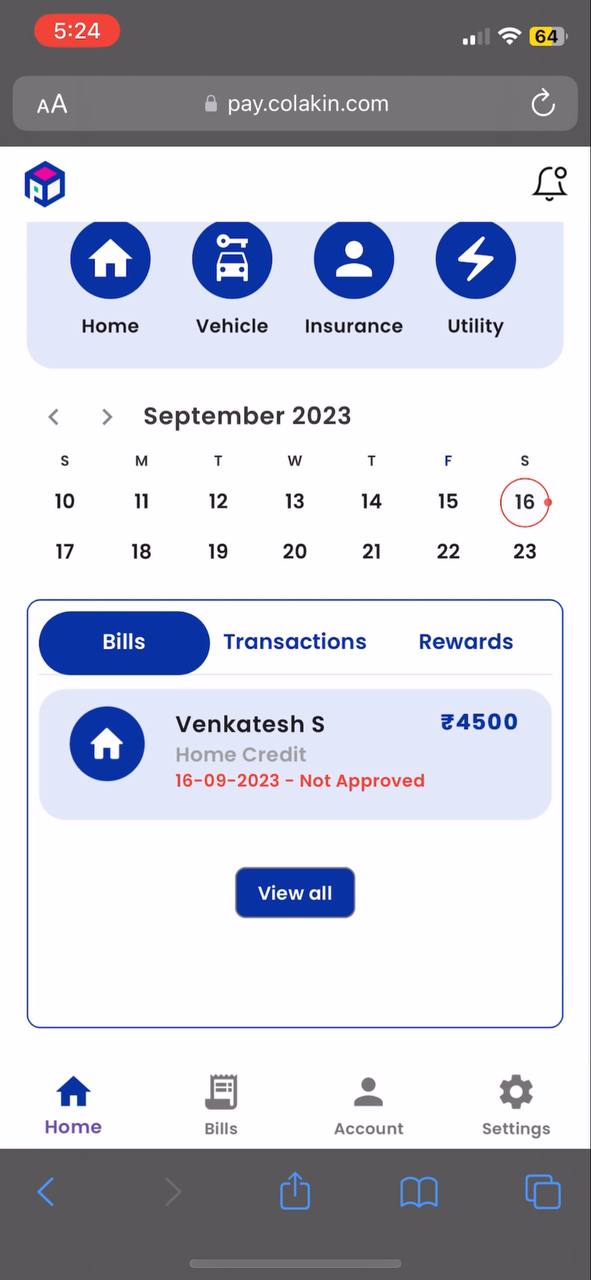
On the dashboard, users can view their bills. When they tap on the date of a specific bill, that bill will be displayed in the Bills Tab below.
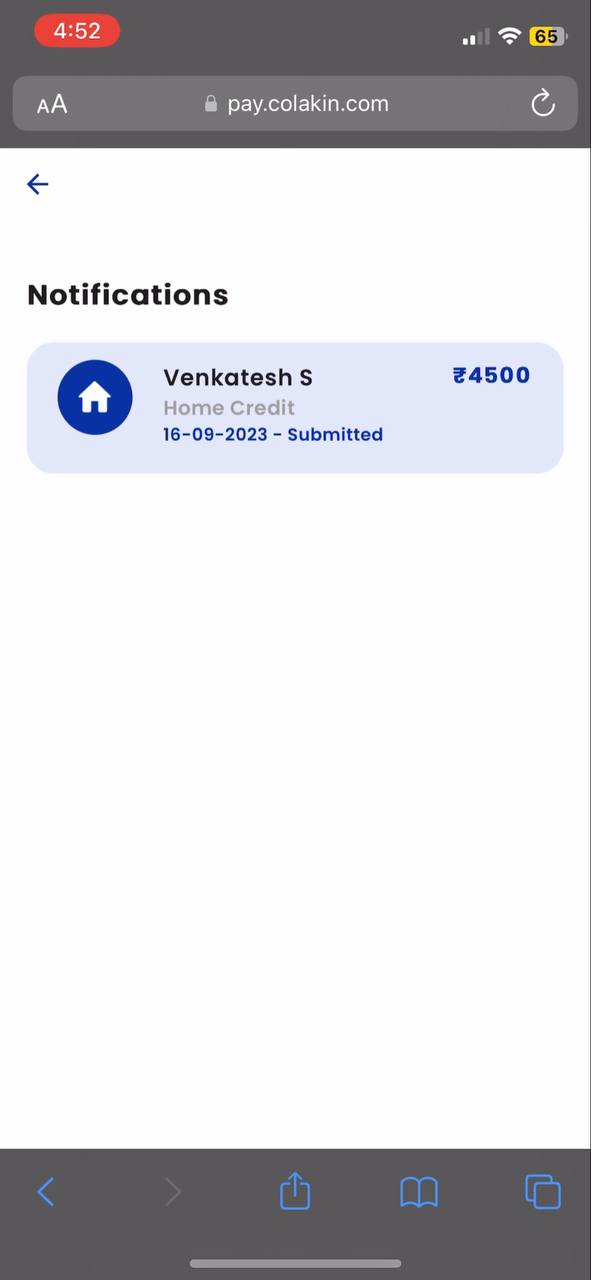
In Notification screen, user can see their Bill Details & Status
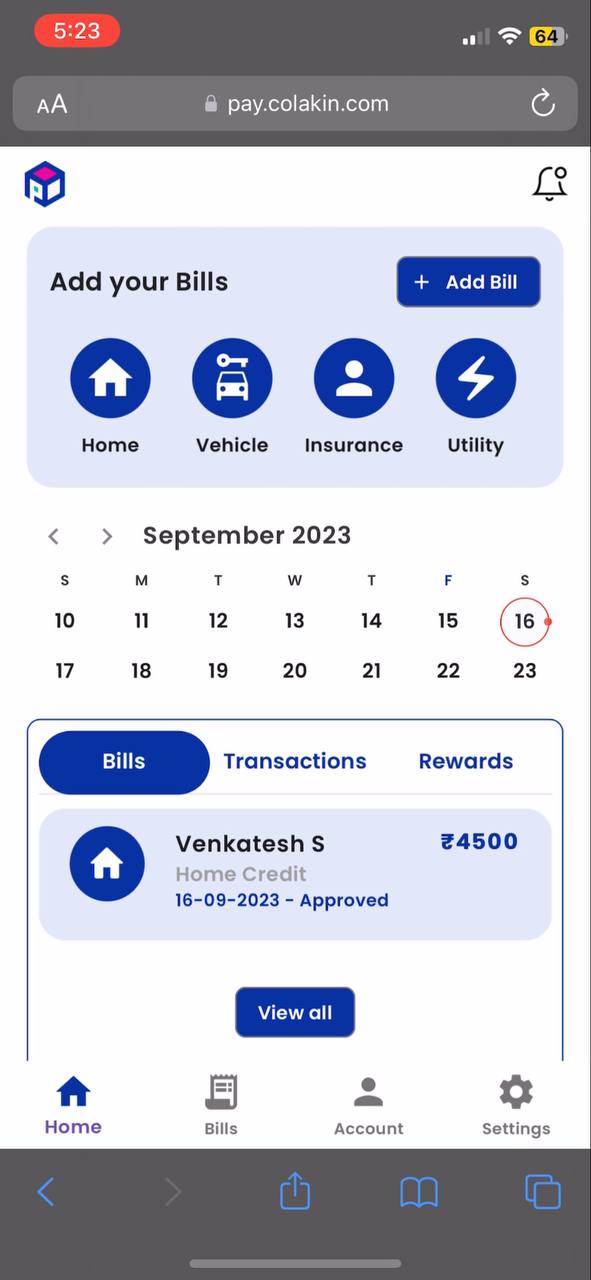
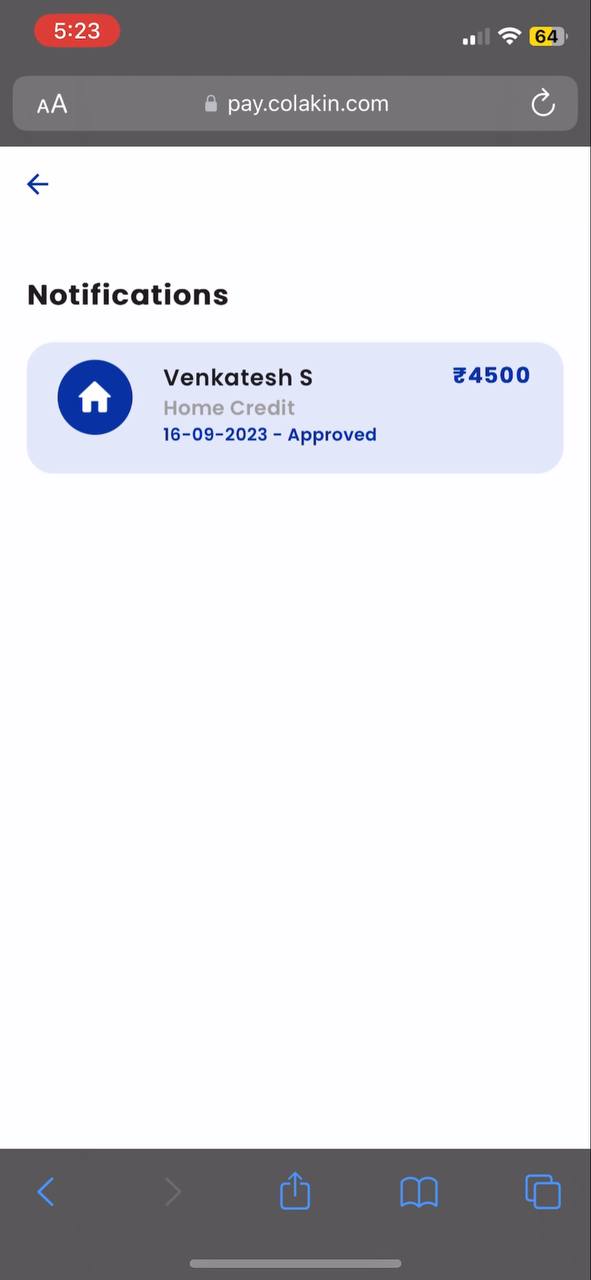
Approved
After successfully adding a bill, the Backoffice BA team verifies the bill and set status as "Approved" when the verification process is completed successfully.
User can see their status in Dashboard on tapping respective date,
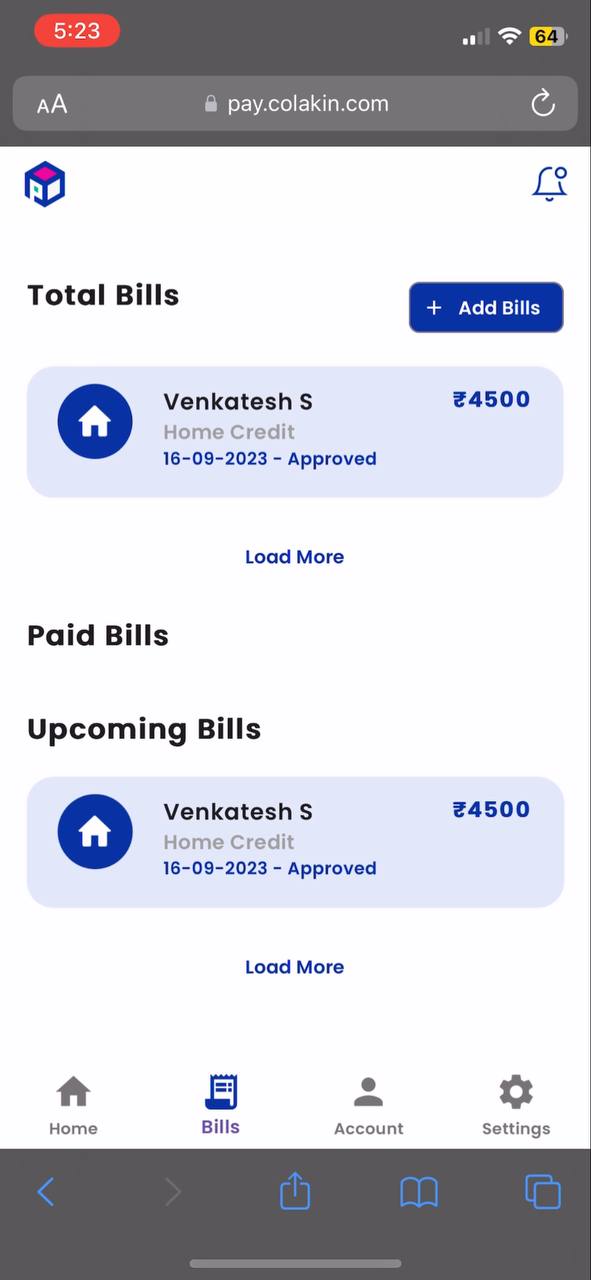
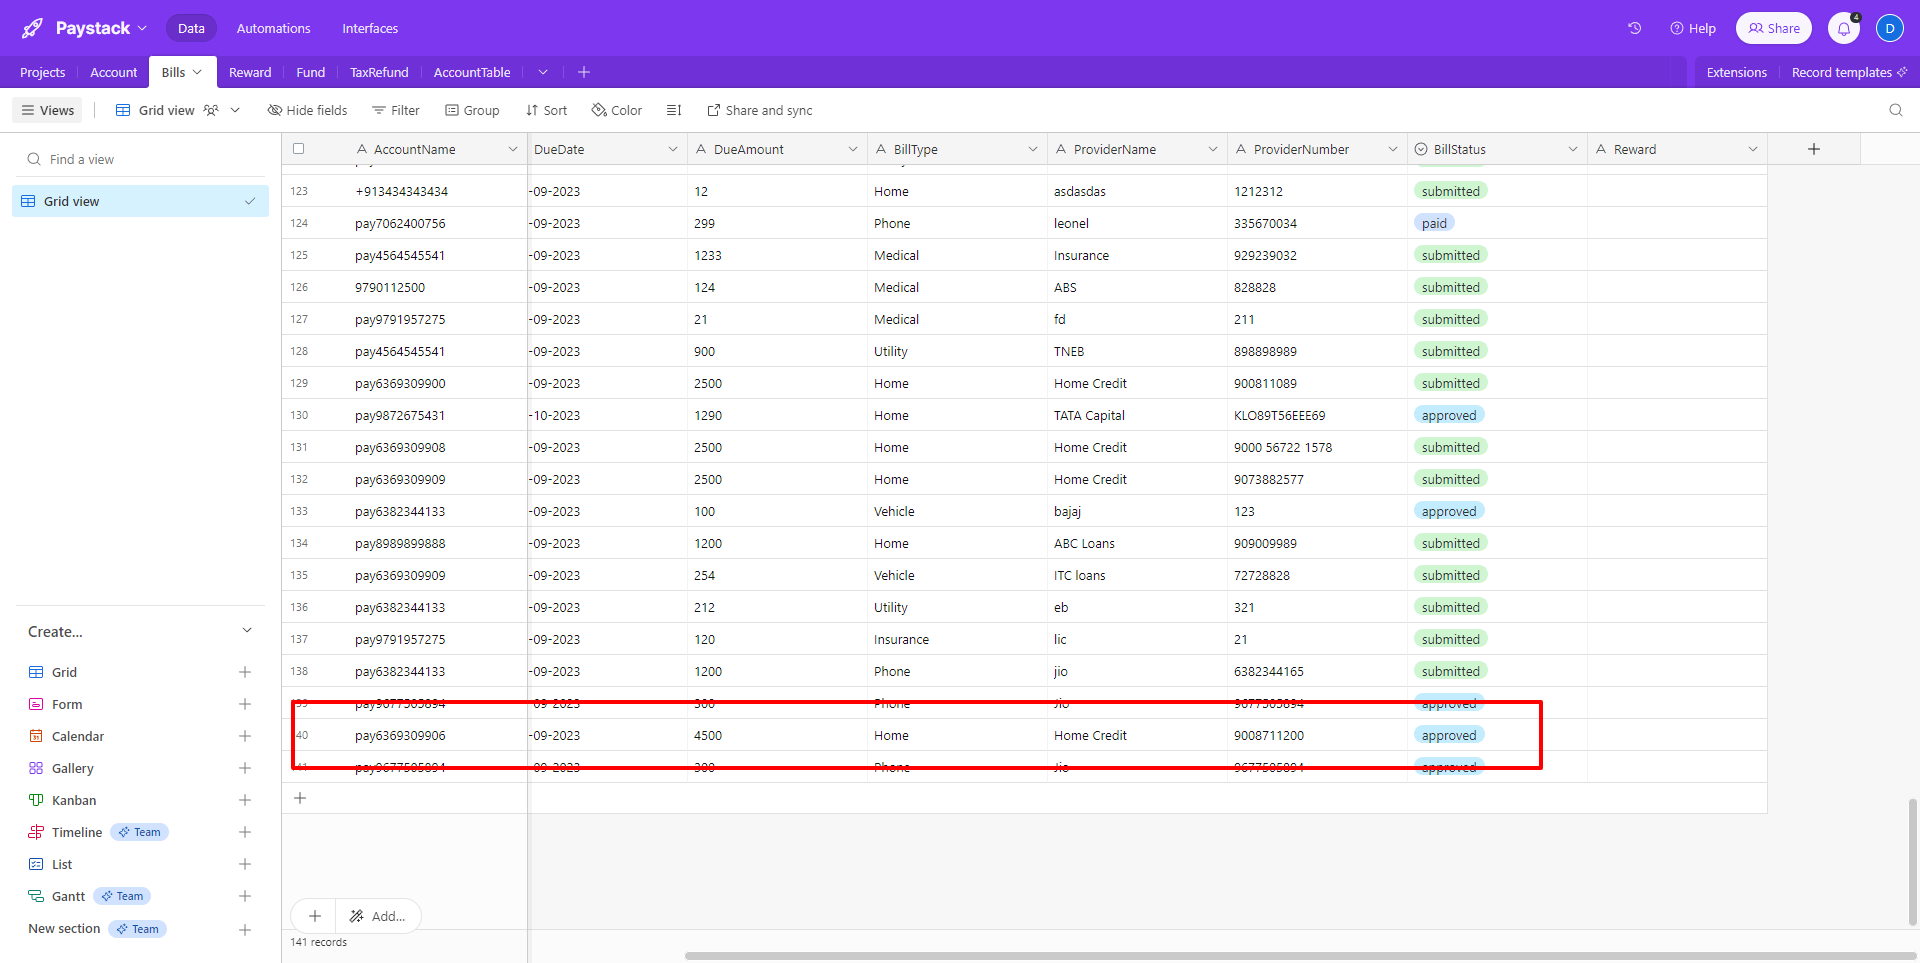
In Bill Screen,
Notification Screen,
Denied
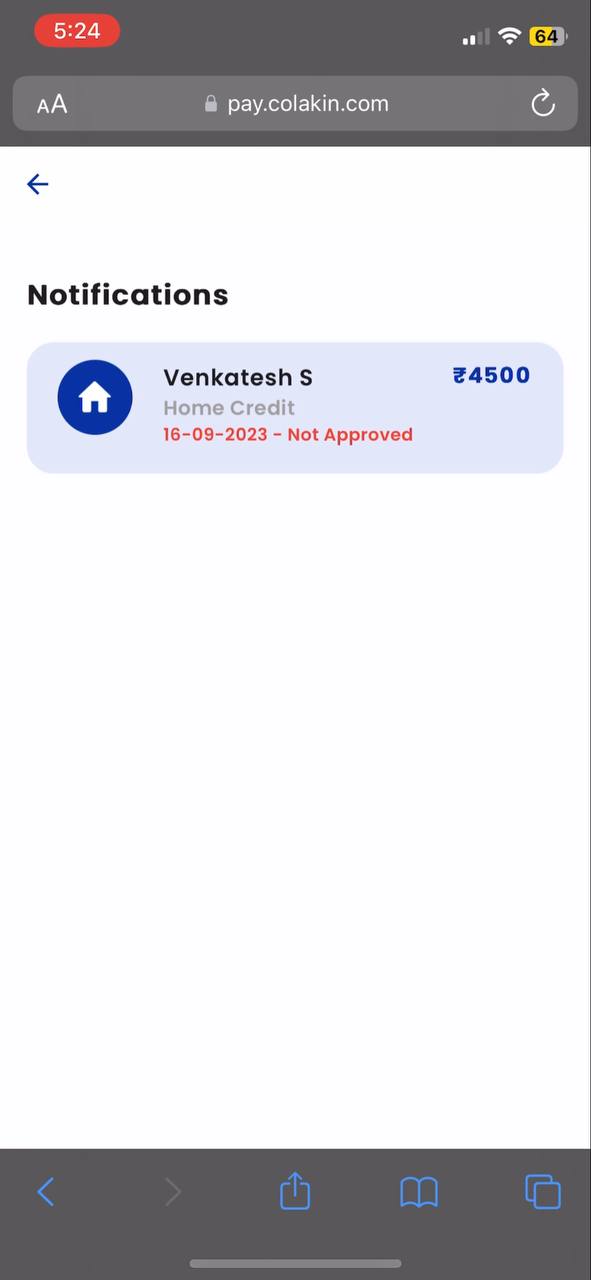
After successfully adding a bill, the Backoffice BA team verifies the bill and set status as "Not Approved" when the bill has not valid details or other issues on paying bill.
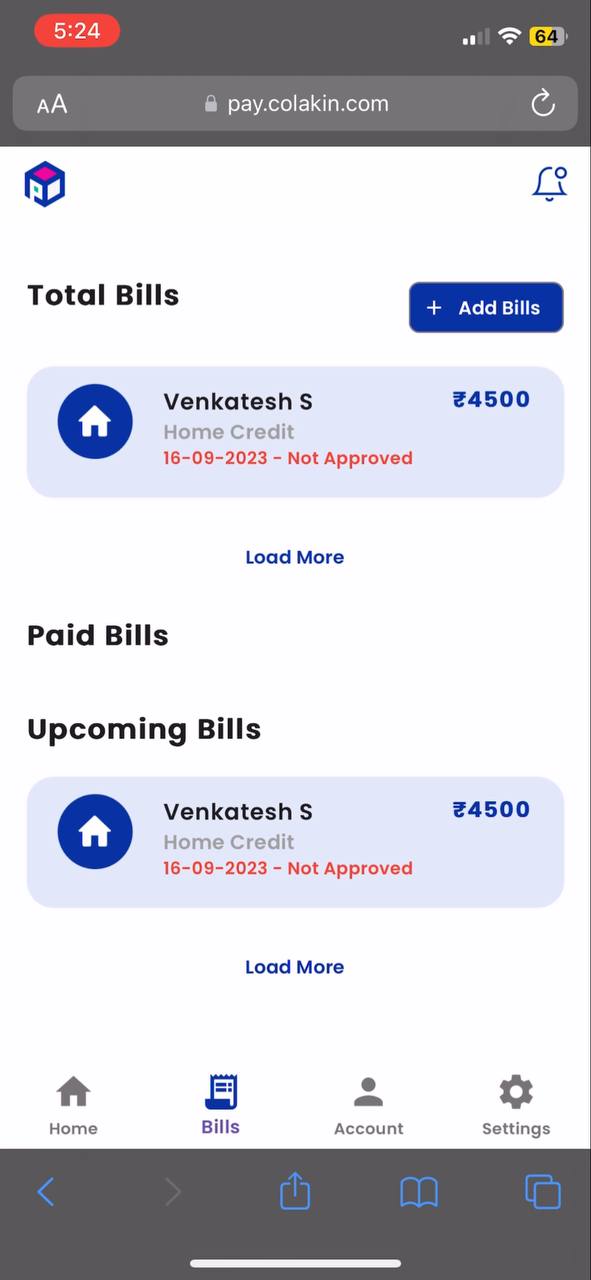
User can see their status in Dashboard on tapping respective date,
In Bill Screen,
Notification Screen,
Back Office Process - After user Added Bill
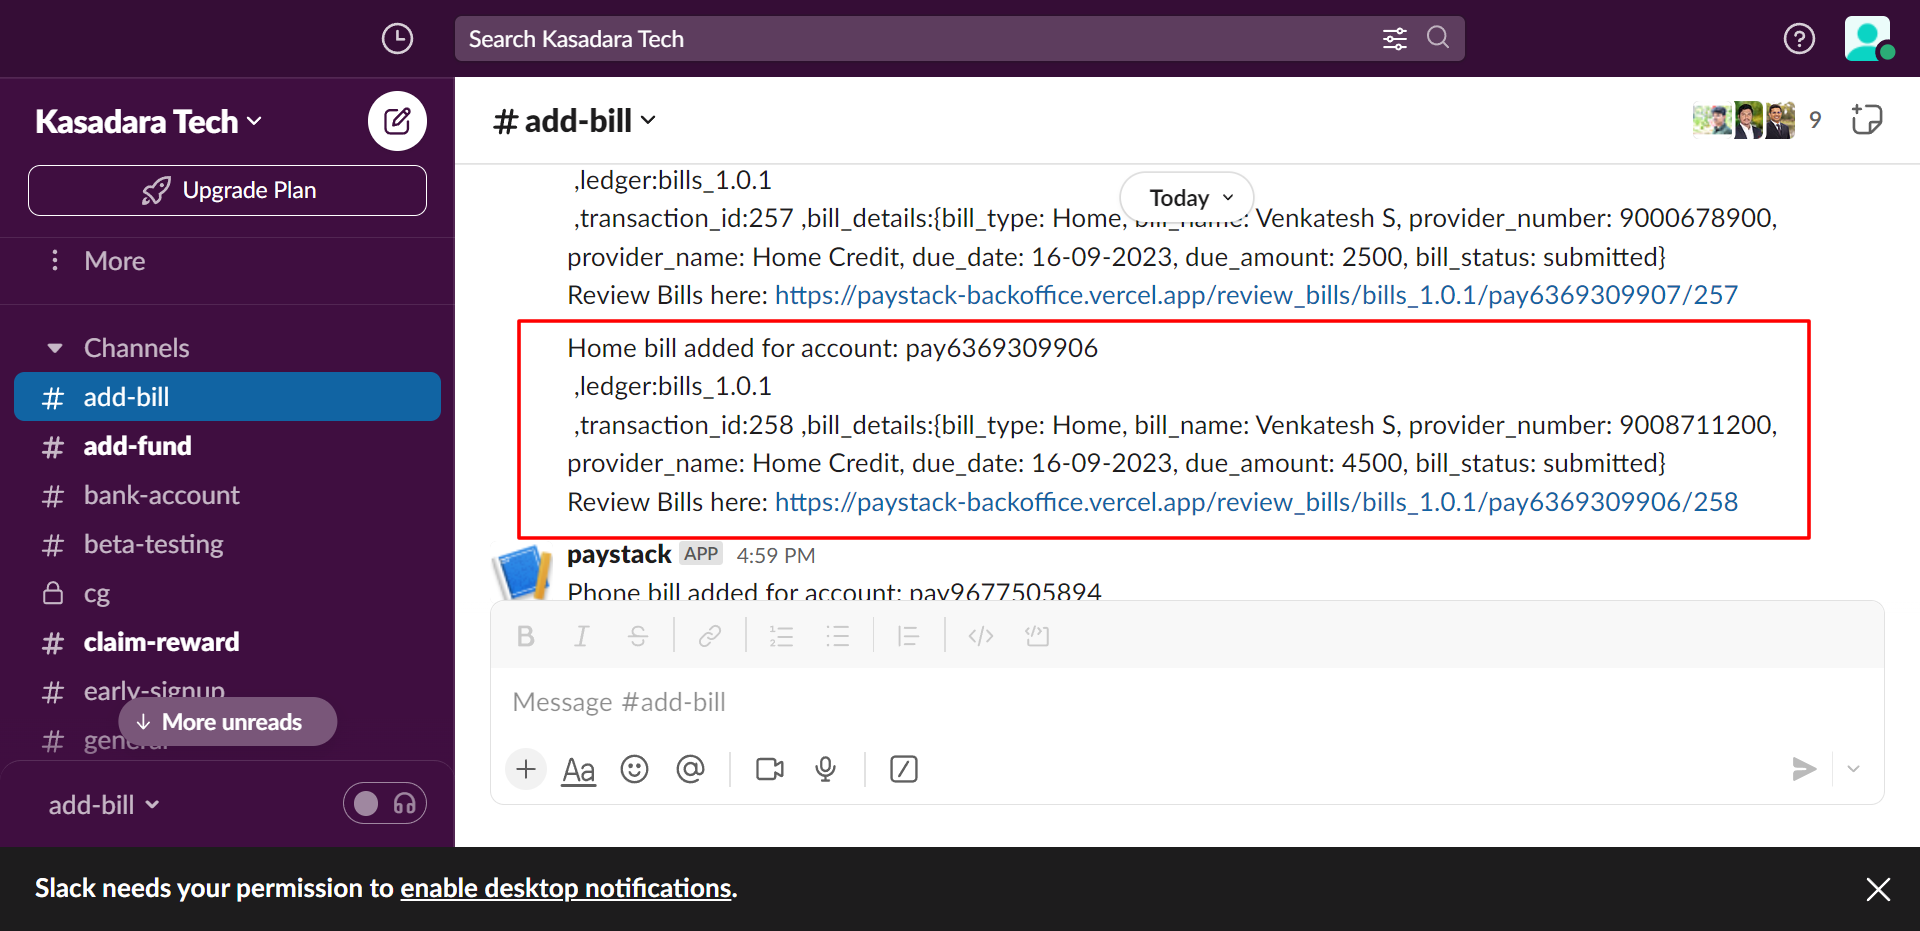
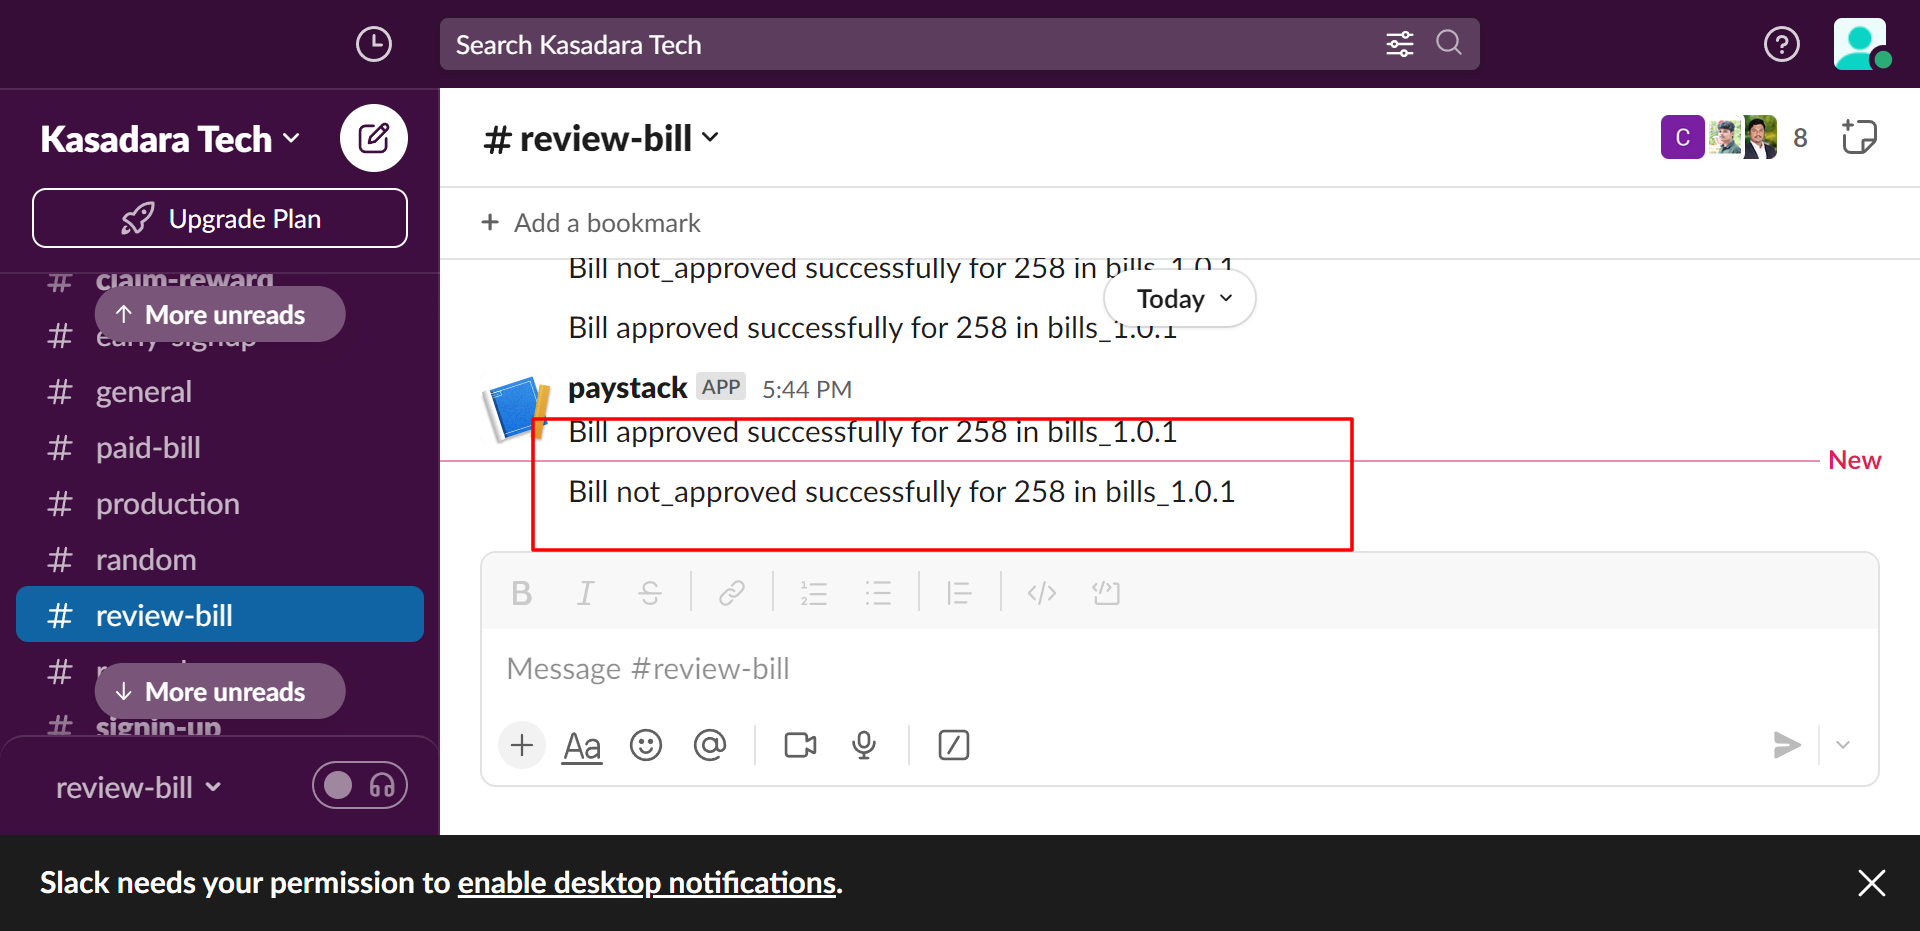
Notification from Slack
After a user has added a bill, a notification is sent to our back office via Slack with his account number, ledger, bill details.
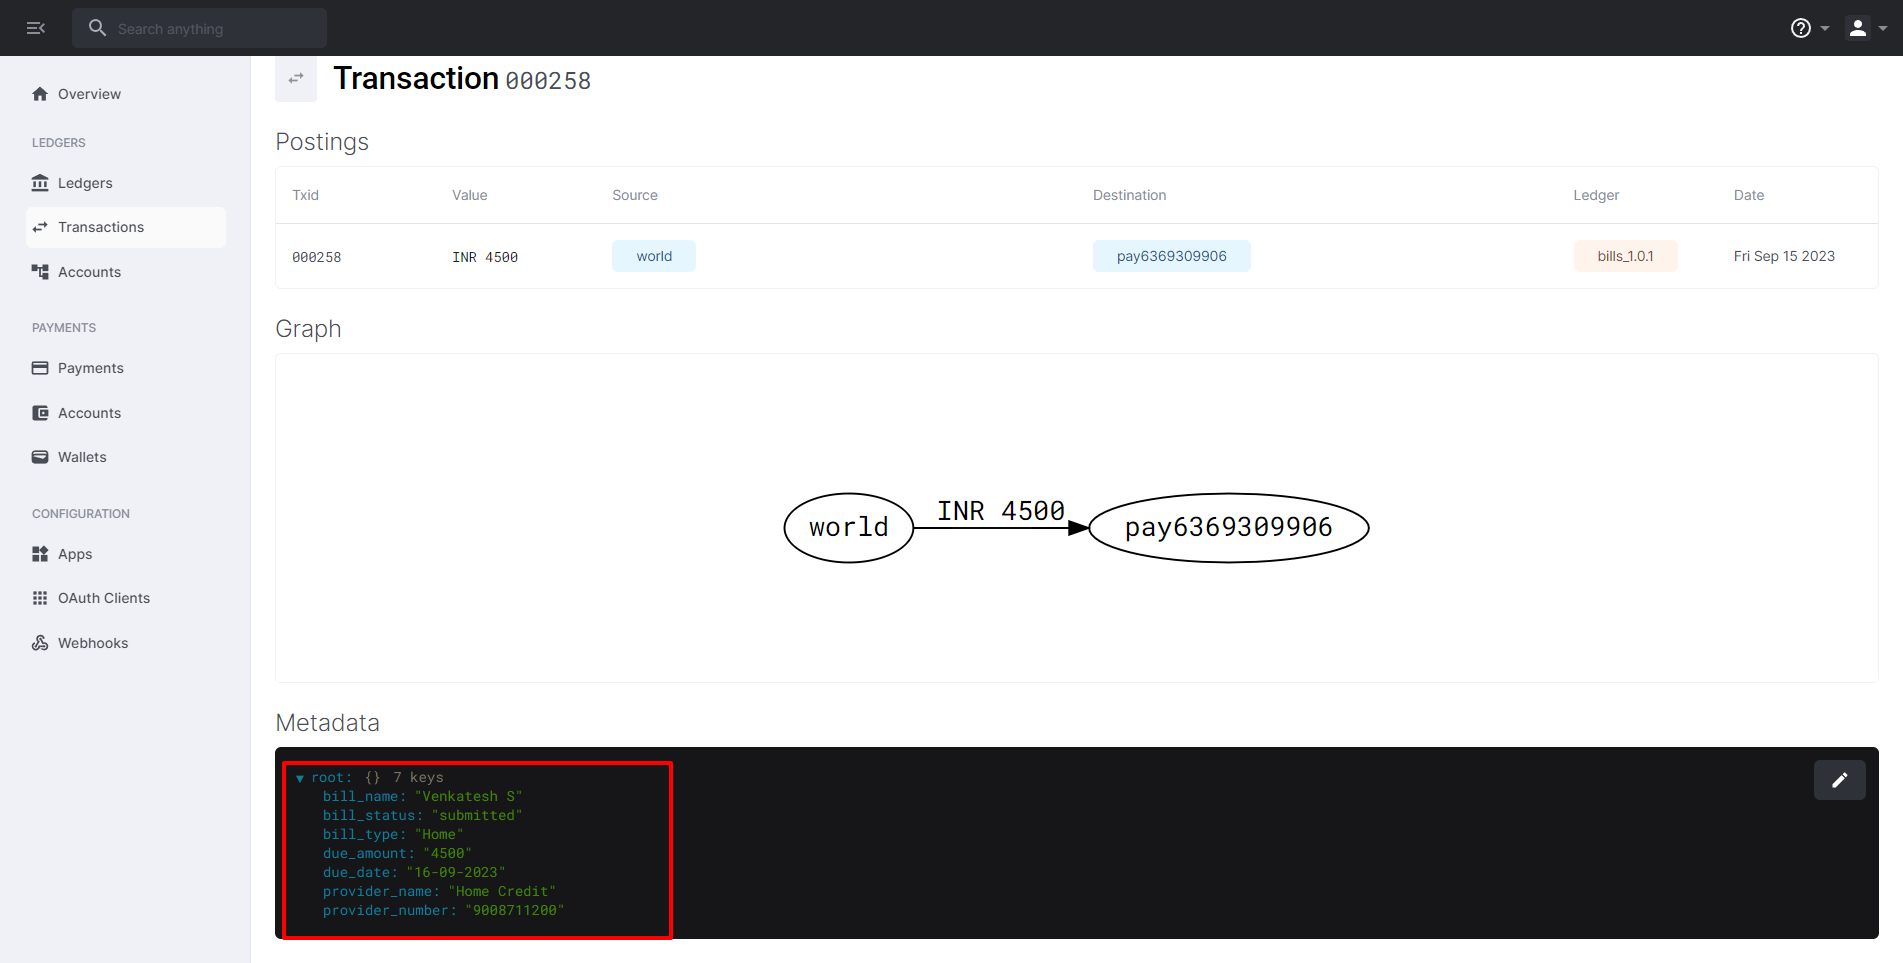
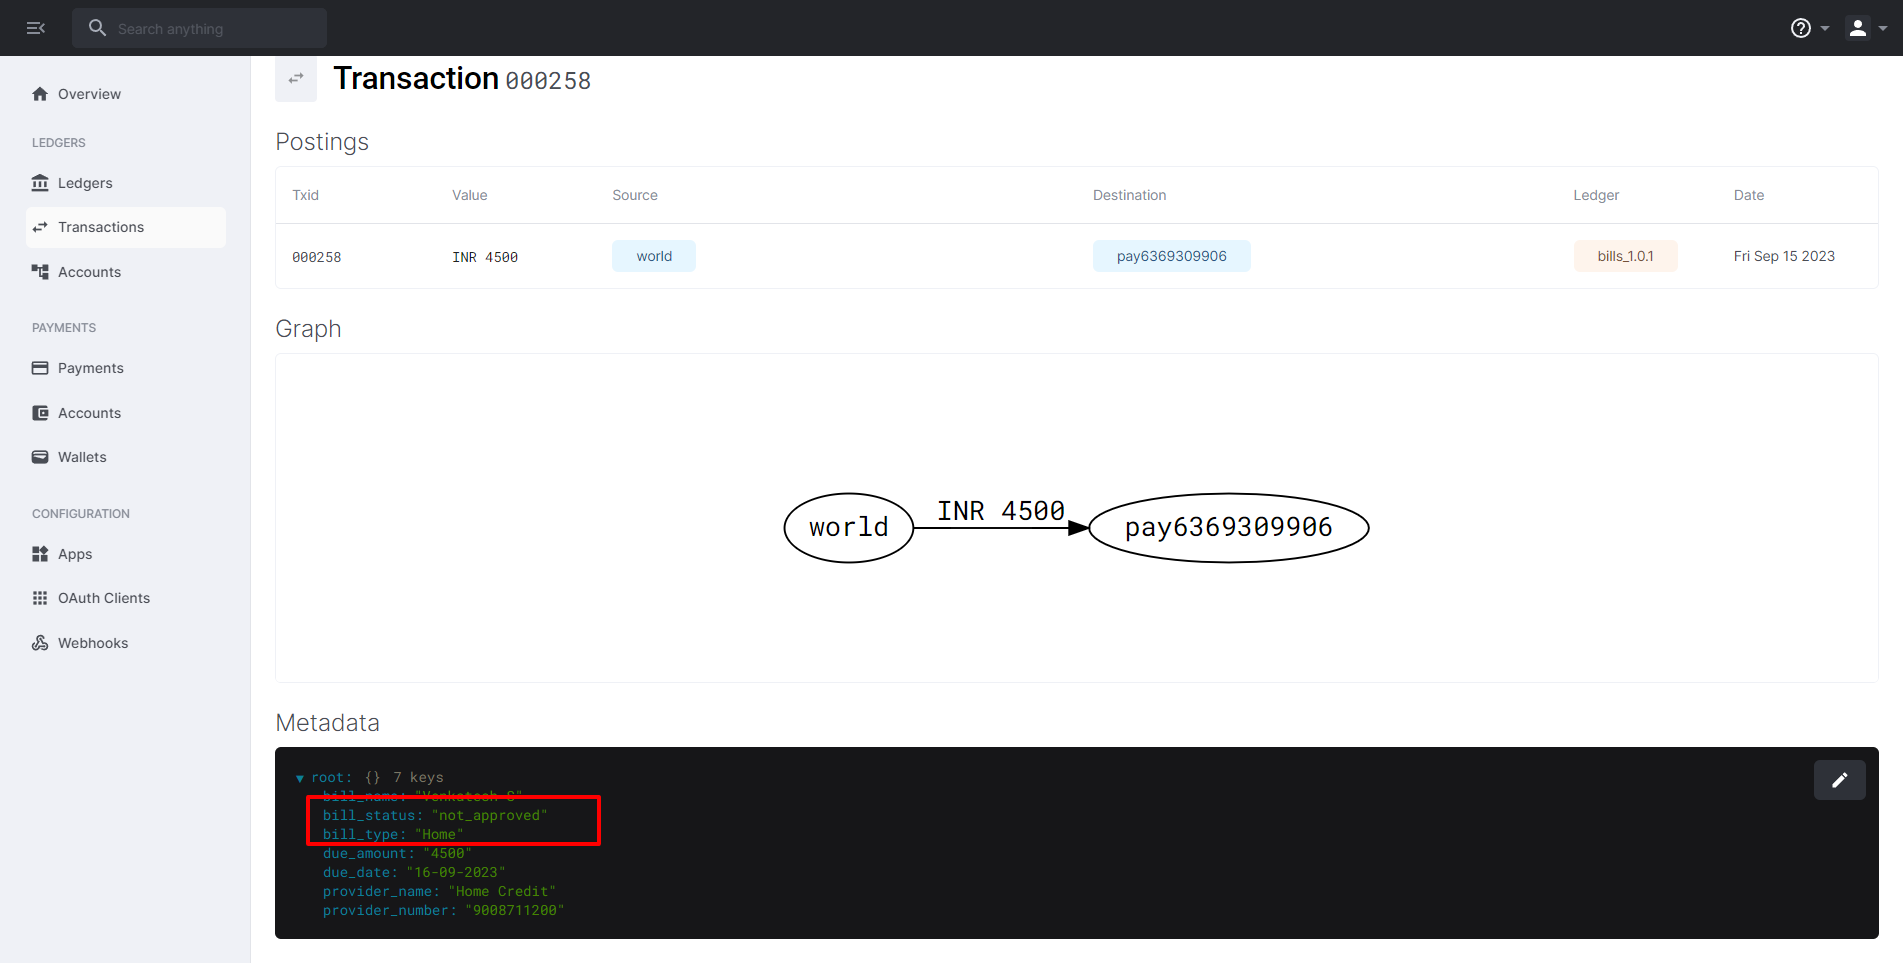
Transaction on Formance
Once a user has added a bill, a corresponding transaction entry with the bill's details is recorded in our ledger application called "Formance."
Entry on Airtable
After Formance Transaction was completed, with transaction ID Airtable have record details of bill in bill Table.

Verify Bill
We use either the Airtable or the information received through Slack notifications to verify that the user data is valid and to check the validity of the bill they have submitted.

Approve Bill
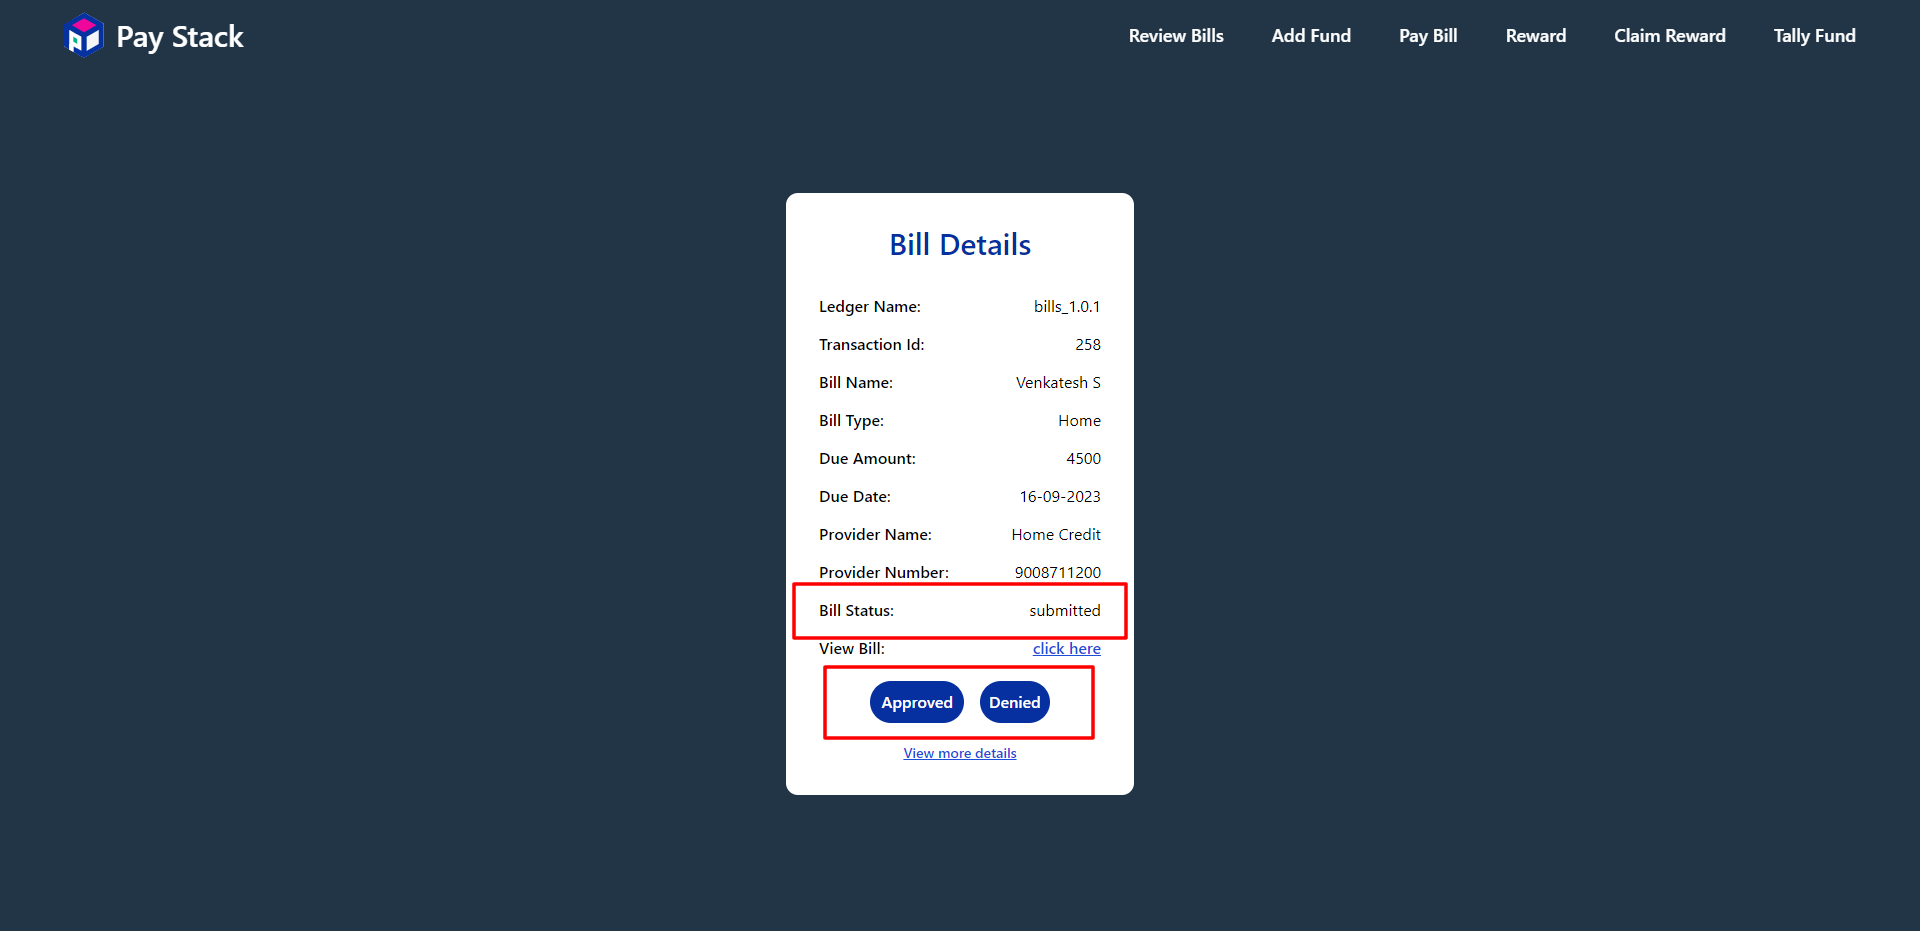
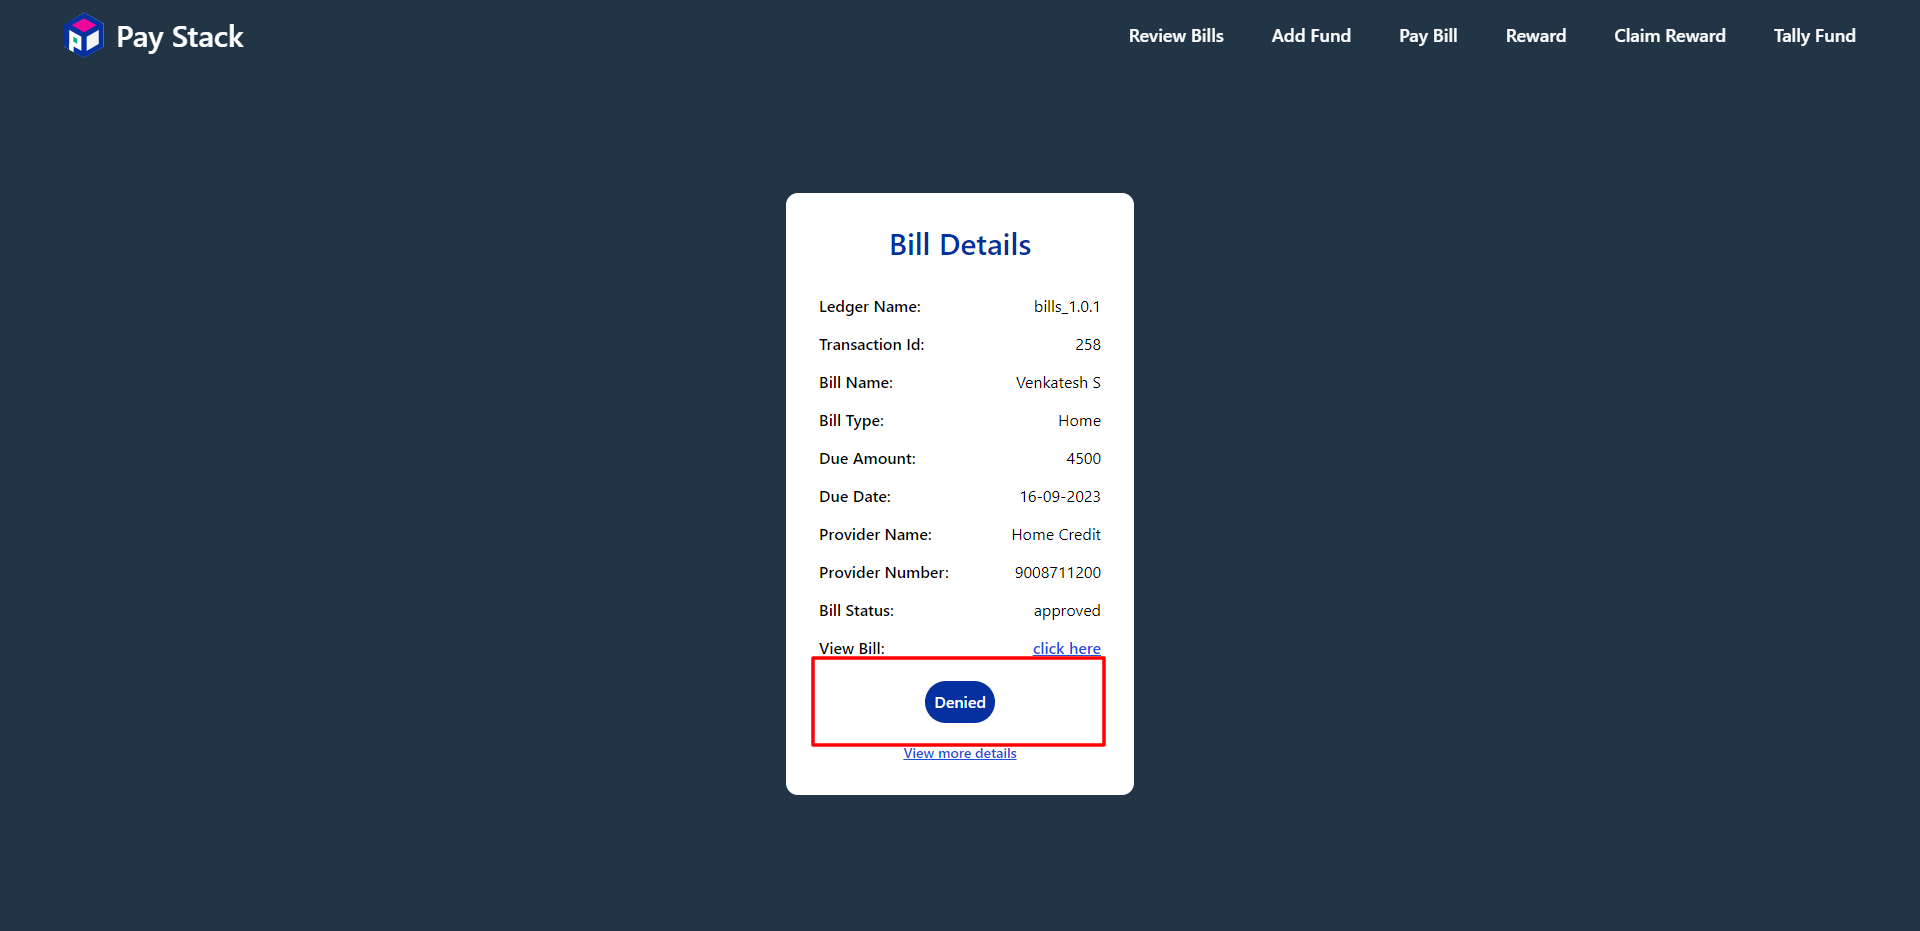
Once the user's bill details have been verified, We will click a Link comes from slack,
Review Bills here: https://paystack-backoffice.vercel.app/review_bills/bills_1.0.1/pay6369309906/258
In Back office UI, will fetch the bill by its id by just clicking the link, After fetching all bill details Transaction's metadeta we will update "bill_status" = "submitted" to "bill_status" = "approved" when click the button Approved if all details are verified and able to pay the bill.
Update in Formance

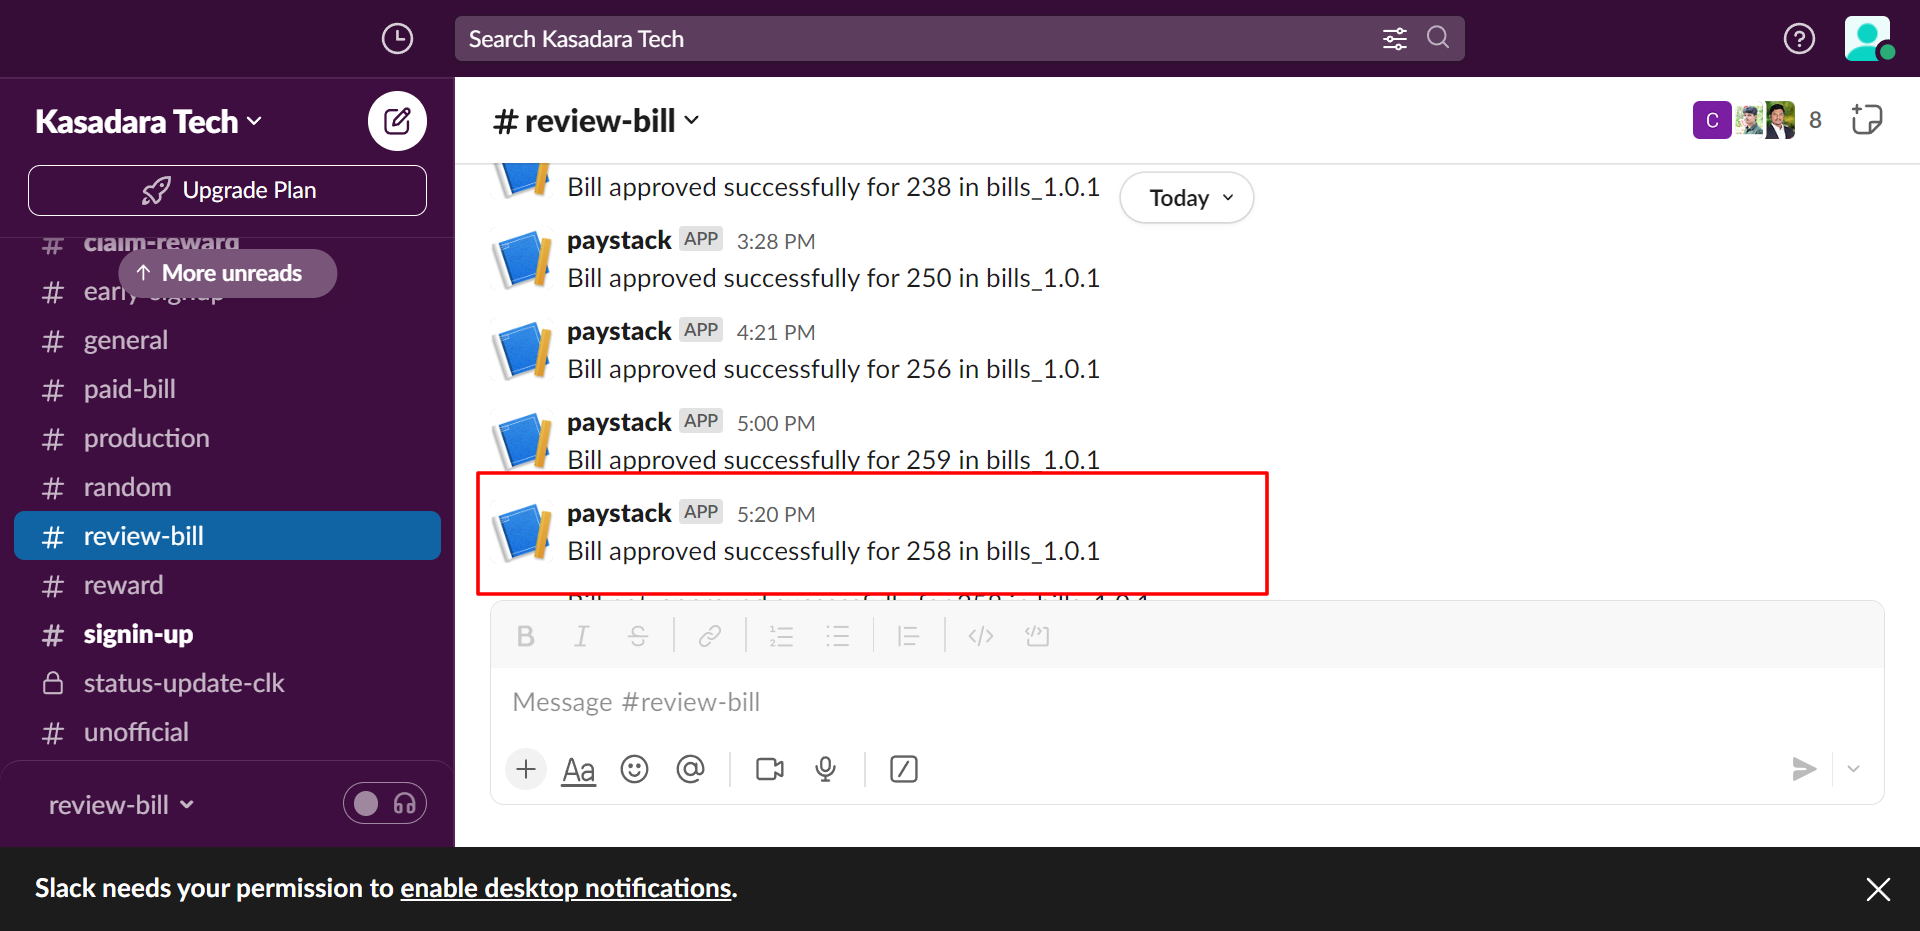
Update in Slack
Update in Airtable
Approved Status - UI
User can see their status in Dashboard on tapping respective date,
In Bill Screen,
Notification Screen,
Not Approved Bill
Once the user's bill details have been verified and details are not clear or wrong, In Back office UI, will fetch the bill by its id, After fetching all bill details Transaction's metadeta we will update "bill_status" = "submitted" to "bill_status" = "not_approved" by clicking Denied button.
Update in Formance
Update in Slack
Update in Airtable
Not Approved Status - UI
Once the bill is not approved user can see their bill status in Dashboard
In Bill Screen,
Notification Screen,